They say a picture is worth 1,000 words, but when it comes to apartment listings, that picture could be worth actual money.
How much? Multiply your average monthly rent by the number of months in your average lease agreement. Now
multiply that number by your average number of vacancies. Yep, we're talking about tens of thousands of dollars potential value.
Having great interior photos could very well be the difference between sitting on empty units and being at capacity. According to Naked Apartments, 70 percent of renters identified issues with photos as their main turn-off when sifting through apartment listings.
Prospective tenants rely heavily on pictures when evaluating properties. And it makes perfect sense. The reality is, the average person just doesn't have the time to do otherwise.
How to Take The Best Apartment Listing Photos
If you've ever perused Craigslist for anything—automobiles, office furniture, job postings—you know just how crowded things can be. Scanning advertisements to save time is a must. And the best way to make apartment listings stand out is by posting the best photos you possibly can.
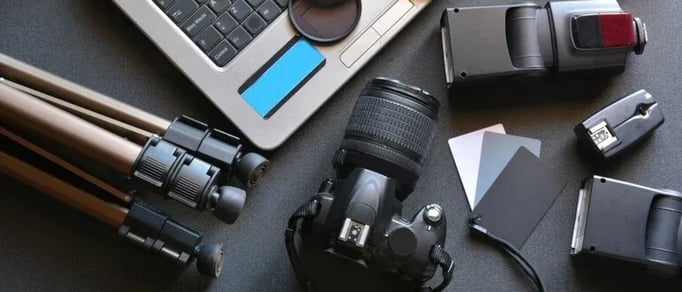
As science repeatedly reminds us, humans are visual creatures. We prefer images to long streams of text, and as anyone with an Instagram account can tell you, not all photos are created equal. If you're reading this article, you probably suspect yours could be a lot better, so we've compiled a list of pro tips to help you take the best photos for your apartment listing.
1. Master The Art of Lighting
Have you ever taken a photo of a beautiful city skyline at night? Or a picture of friends around the dinner table? You probably looked at the finished result and thought, "Hmmph, that does NOT look like what I'm seeing in front of me!"
It's a common experience—taking disappointing photos in artificial lighting. The reality is, most cameras (with the exception of professional DSLRs) are not built to recognize artificial light in the same way as the human eye. This is why natural light should be your new best friend.
When used appropriately, natural light provides several benefits:
- Brighter and more vibrant colors,
- Softening of undesirable "blemishes" (i.e. old counter tops, cabinets etc.), and
- Minimization of unsightly shadows (that would have to be fixed in editing).
Pro Tips:
- Photograph during the early morning and evening hours.
- Slow down your shutter speed to make photos brighter.
- Turn off all artificial light sources in your interior.
- Open blinds, curtains, and even doors.
2. Shoot Straight On
One of the reasons professional photographers are good at what they do is that they understand balance, symmetry, and composition. While interesting camera angles can provide nuance, they are inherently difficult to pull off. Instead, use your room's natural architectural lines to align your photos straight on.
And, since nothing's worse than a photo that appears to have been taken at high sea, use your camera's grid option. Note: iPhones and androids have this feature, too. With the grid option turned on, you will see an overlay of lines in your camera's viewfinder. Align the top horizontal line with the top of the frame you'd like to capture. Use a tripod if necessary to maintain evenness.
3. Stage Your Space
Staging can range from elaborate to simple. They key is to present a space that is clean and free of clutter. It should inspire prospective tenants to imagine themselves there. Ideally, some furniture should be present to provide a sense of space. Consider renting furniture if necessary to provide the right effect.
Remove any electronic cords from the site, freshly paint walls, clean floors, and shine appliances. Once your space is ready, consider taking photos of every room. This will really help your apartment listing stand out as most listings fail to provide variety.
Pro Tip: If possible, empty the parking lot before your shoot. That way the many sizes, shapes, and colors of cars won't "accidentally" appear in your photos.
4. Understand Camera Apertures
Your camera's aperture is the mechanism that regulates the size of the hole that emits light. By changing the aperture size or setting, you can adjust the amount of light allowed through. The mechanism also controls the depth of field.
Change your aperture settings depending on what you want to do. Want to shoot a closeup of an item with a blurred background? Shoot with a wide aperture (and smaller number). Want to shoot a wide shot of a large room? Shoot with a narrow aperture (and larger number).
5. Edit Your Photos
While photo editing software is not a substitute for high-quality photos, it is a valuable tool. Programs like Adobe Photoshop can fix a variety of lighting issues.
The trick with editing? Use it to make your photos more closely resemble what you saw with your eyes. Don't overdo it! Photos should appear natural, as if they weren't edited at all.
Pro Tip: A variety of photo editing apps now exist that can be downloaded for free or little cost. Check out PS Express, VSCOcam, and ProCam if you're using an iPhone.
Taking The Best Apartment Listing Photos
As you can see, by making just a few small adjustments, you can take your interior photos from "eh" to awesome. Nonetheless, you may still prefer to hire a professional photographer. If so, look for someone who is specifically experienced in apartment photography. Also, make sure they avoid using wide-angle lenses.Though they may be tempting (to make rooms appear more spacious), they're often misleading.
Above all, you want your photos to attract potential renters to the property. And that means accurately depicting units so visitors are pleased upon arrival.